Just a little heads up- my turban style handmade headbands will be featured on VeryJane tomorrow for almost 50% off. A limited quantity will be available in 5 colors (black, grey, mustard, coral, and cobalt) and are super soft and comfy. The deal will go live in just a few hours! I'm so excited but oh so nervous.
And... I have some crazy pretty friends-turned-models, don't I? Lucky me!
Showing posts with label featured. Show all posts
Showing posts with label featured. Show all posts
Wednesday, July 17, 2013
Wednesday, October 12, 2011
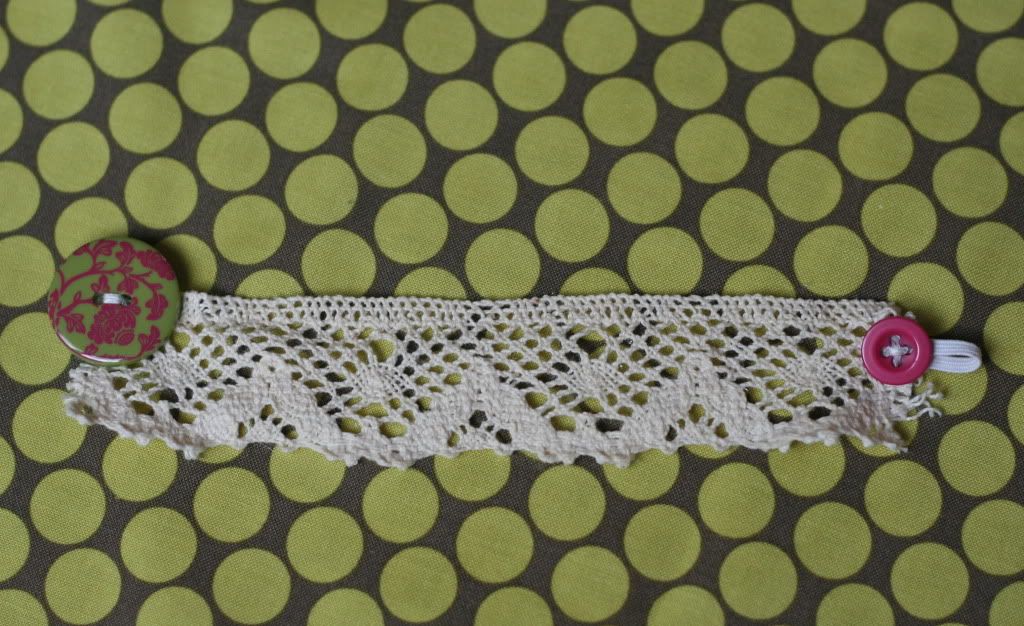
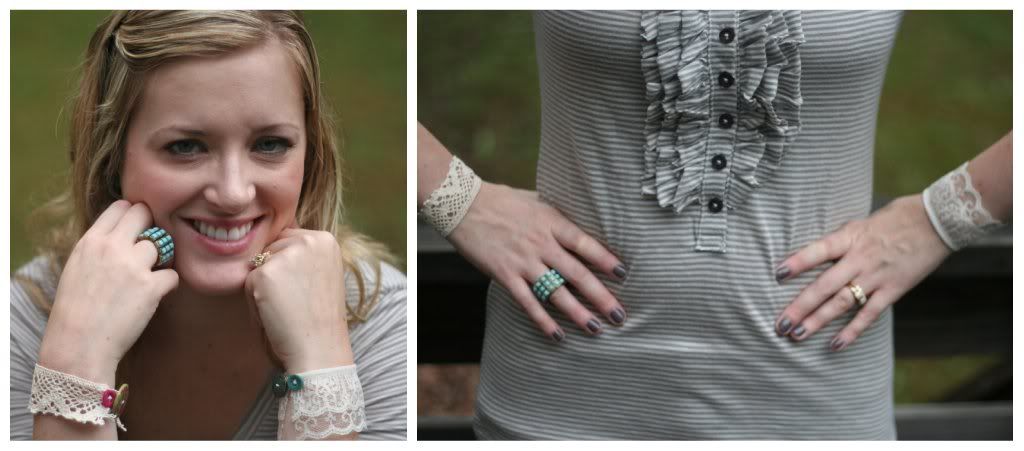
simple lace cuffs
I shared a little tutorial a few weeks ago on how to make some easy lace cuffs. In case you missed it, here it is!
Let's get started!
Materials:
-one or more piece(s) of lace or crochet-look lace (you don't need much, only enough to wrap around your wrist)
-1/8' braided elastic
-buttons
-plastic wrap
-cup or other small cylinder
-fabric stiffener
-scissors
-needle & thread (coordinating color with your buttons, if desired)
-optional- Fray Check (even though I didn't use it, and if you use enough fabric stiffener you definitely won't need it)
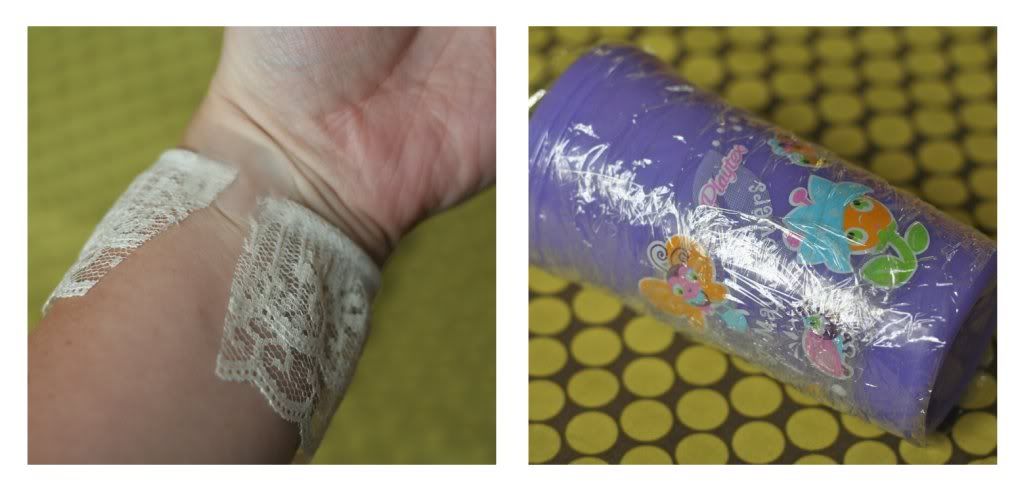
1. Wrap the lace around your wrist and cut to desired length. I taped the lace on my wrist to see if I liked the length. I ended up using about 6" for my wrist, but I've been told that my wrists are kind of small. Wrap the cup (can you tell I have a 2 year old?!) in plastic wrap.
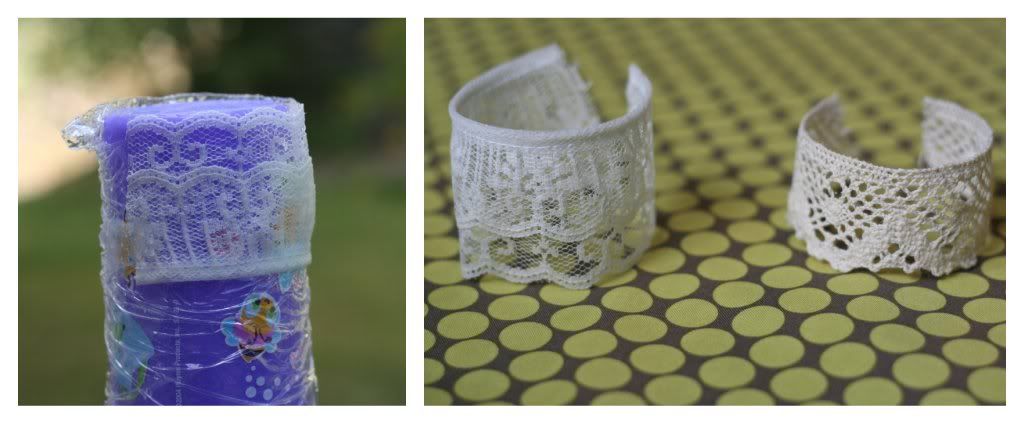
2. Wrap the lace around the cup and tape in place.
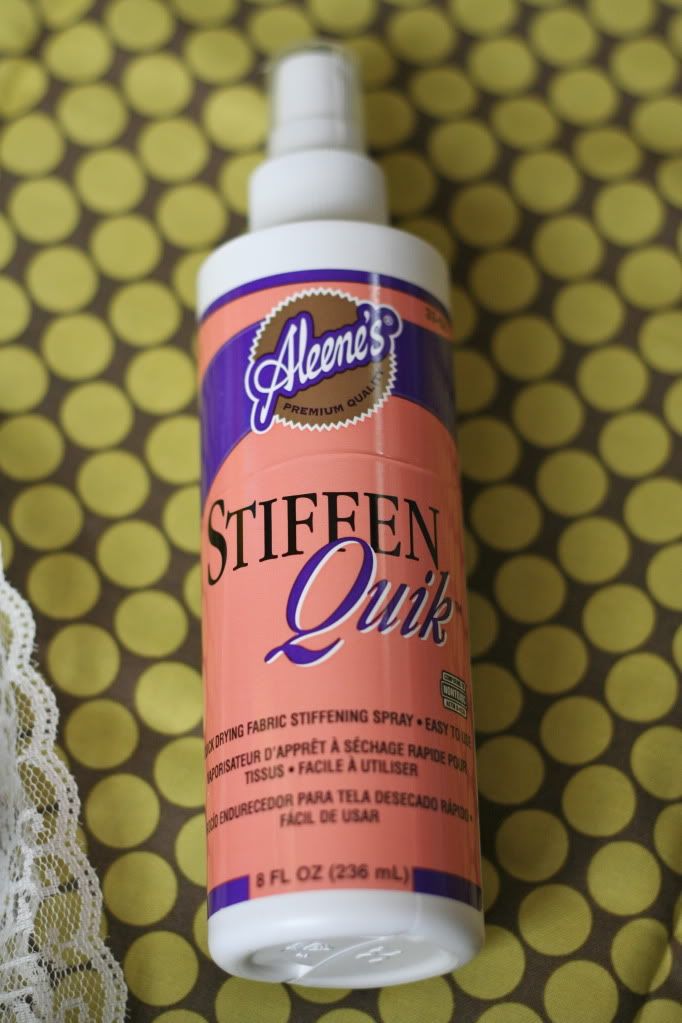
3. Arm yourself with the trusty miracle worker, A.K.A. the fabric stiffener.
4. Spray the heck out of that sucker! I soaked the lace with the fabric stiffener (I did this step out on my deck; it might be a good idea to do this step outside) and came back a few times to re-spray.
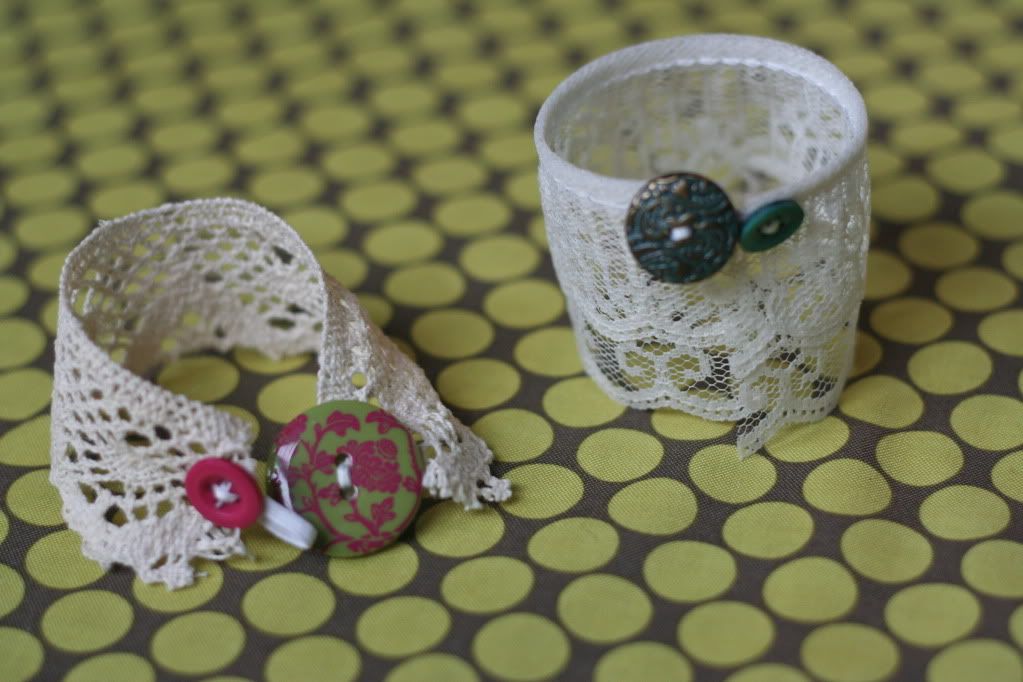
5. Let the lace sit at least overnight or until completely dry. Your lace piece(s) should now look like this. If you so desire, run a thin line of Fray Check along the cut sides of the lace pieces. However, I didn't do this and I'm pretty sure you'll be safe if you just use a ton of fabric stiffener.
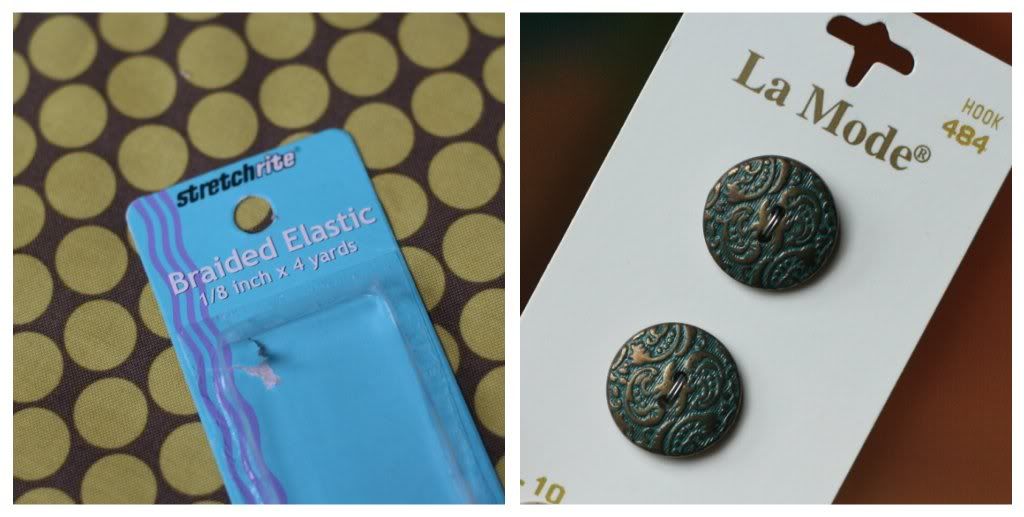
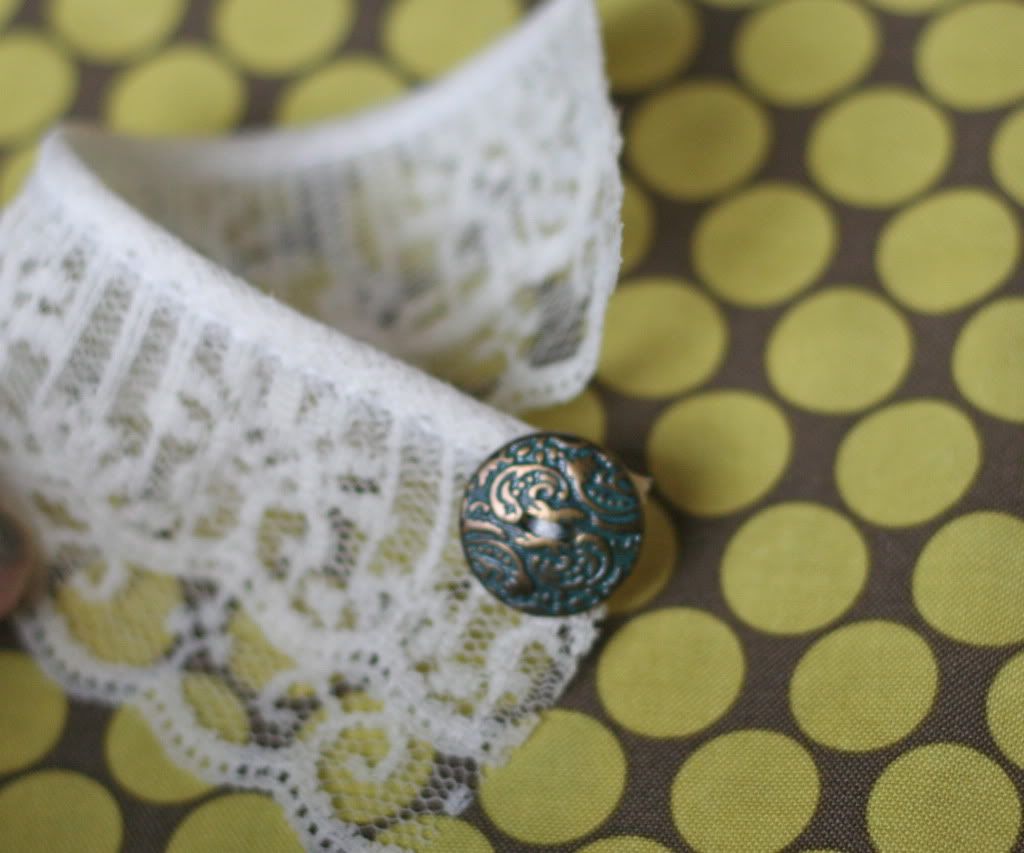
6. Now it's time for buttons and elastic. Aren't those buttons pretty? I thought they looked very vintage-y and for $1.10 for two, I was sold.
7. Stitch one button onto the end of the lace, making sure the button is sewn VERY securely to the lace. See how coordinating thread might have been a good choice here? Oh well.
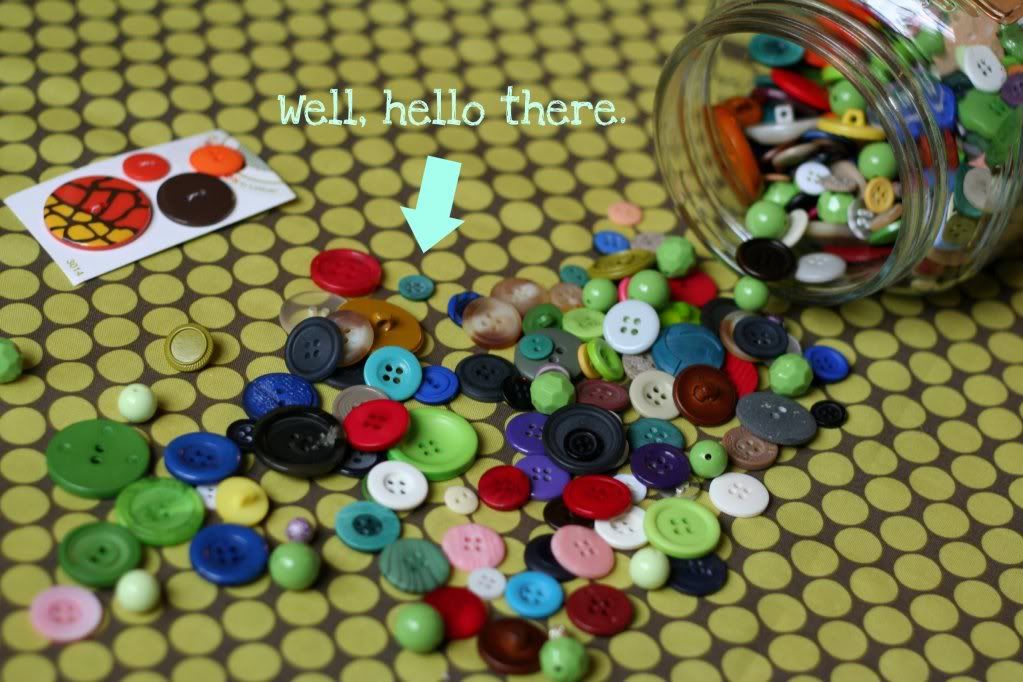
8. Now for a coordinating button! Ahhh buttons. Here's my collection. I lovehoarding collecting buttons, fabric, thread, paper... it's a problem, people.
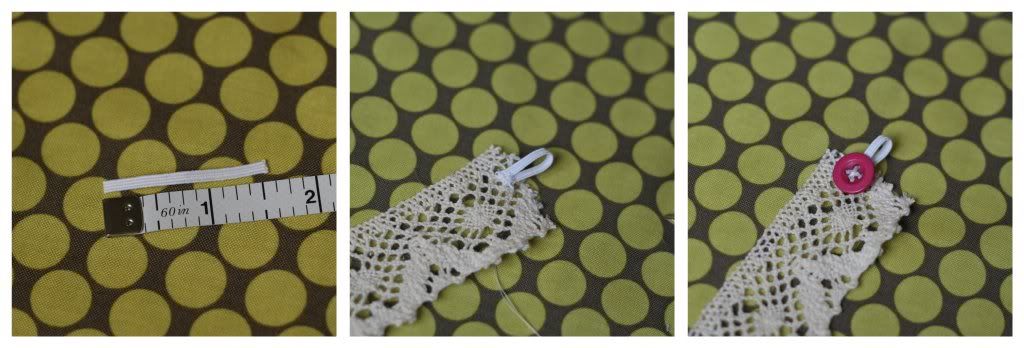
9. Attach a strip of elastic measuring about 1 1/2" to the other cut end of the lace and secure the coordinating button on top of it to conceal the raw elastic edges. I tend to get a little over-zealous in carrying out my plans (which I make up as I go along) so sometimes I forget to take pictures of crucial steps. This was one of those times. But fear not, I made another lace cuff and I remembered the second time. :)
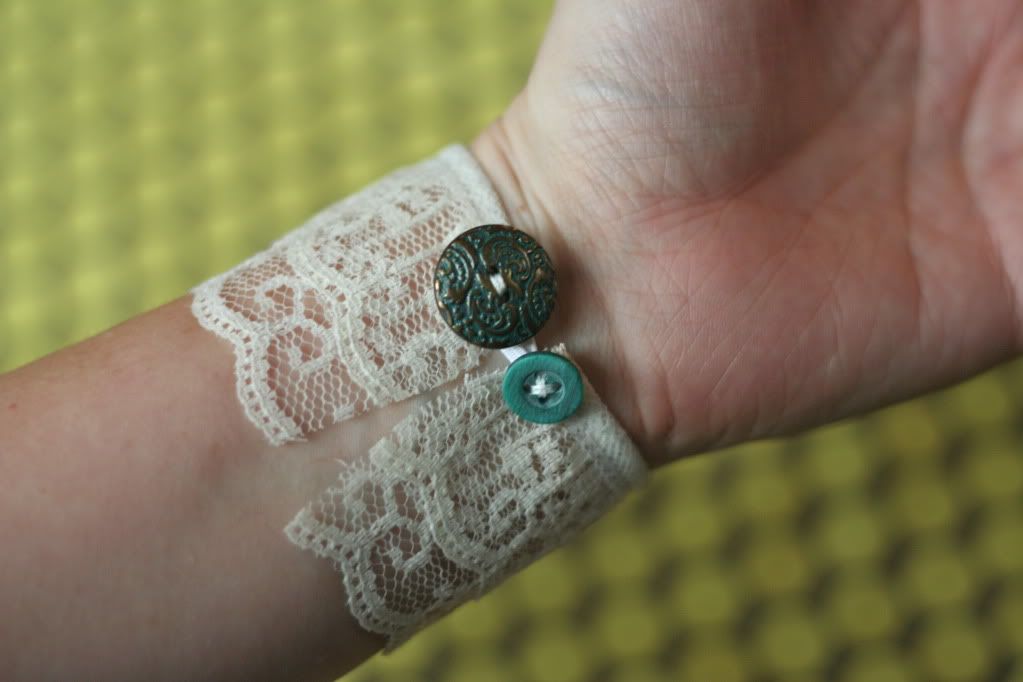
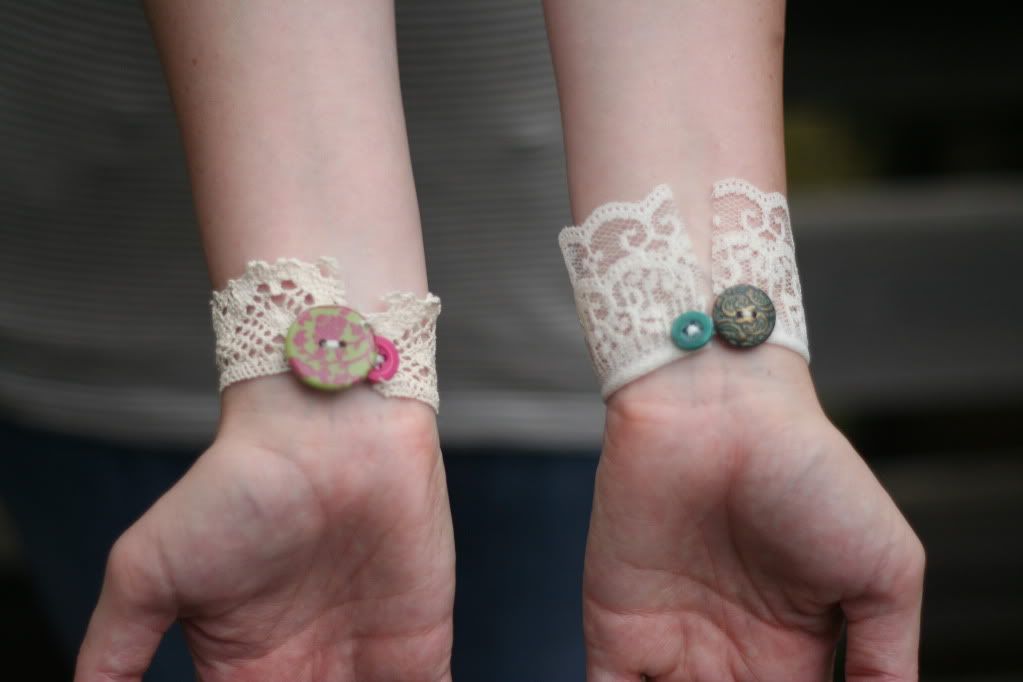
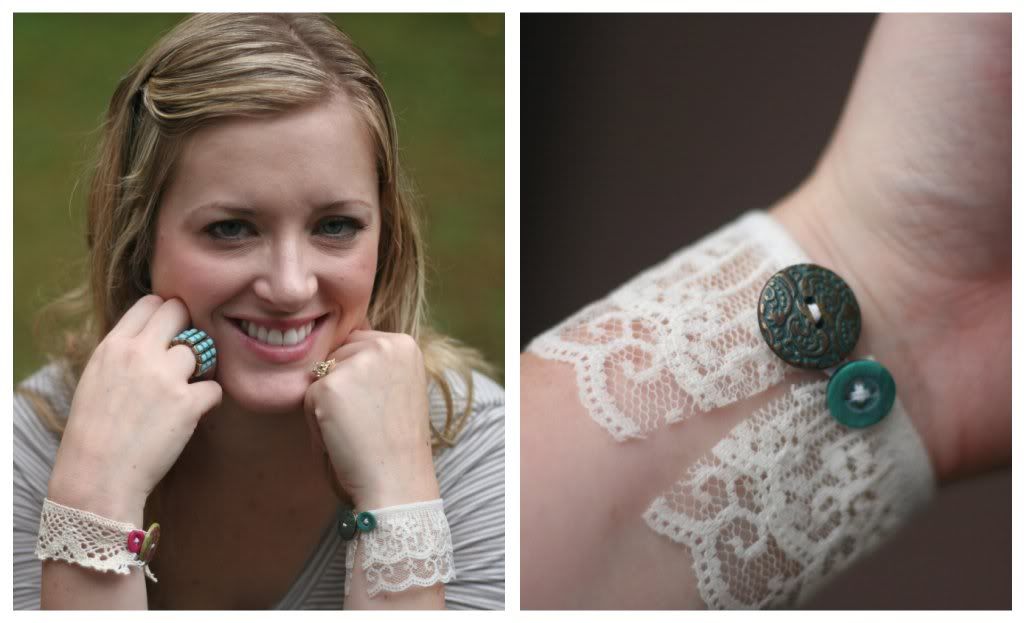
I am in love with these lace cuffs! I wore one a few weeks ago with a simple outfit and I felt like the bracelet just gave my look a little something extra and special. And extra special. :) Enjoy!
Linking up at I heart naptime, six sister's stuff, today's creative blog, kojo designs, and tatertots and jello
Today, I'd love to show you how I made these cute, kinda Anthro-ish lace cuff bracelets!
Let's get started!
Materials:
-one or more piece(s) of lace or crochet-look lace (you don't need much, only enough to wrap around your wrist)
-1/8' braided elastic
-buttons
-plastic wrap
-cup or other small cylinder
-fabric stiffener
-scissors
-needle & thread (coordinating color with your buttons, if desired)
-optional- Fray Check (even though I didn't use it, and if you use enough fabric stiffener you definitely won't need it)
1. Wrap the lace around your wrist and cut to desired length. I taped the lace on my wrist to see if I liked the length. I ended up using about 6" for my wrist, but I've been told that my wrists are kind of small. Wrap the cup (can you tell I have a 2 year old?!) in plastic wrap.
2. Wrap the lace around the cup and tape in place.
3. Arm yourself with the trusty miracle worker, A.K.A. the fabric stiffener.
4. Spray the heck out of that sucker! I soaked the lace with the fabric stiffener (I did this step out on my deck; it might be a good idea to do this step outside) and came back a few times to re-spray.
5. Let the lace sit at least overnight or until completely dry. Your lace piece(s) should now look like this. If you so desire, run a thin line of Fray Check along the cut sides of the lace pieces. However, I didn't do this and I'm pretty sure you'll be safe if you just use a ton of fabric stiffener.
6. Now it's time for buttons and elastic. Aren't those buttons pretty? I thought they looked very vintage-y and for $1.10 for two, I was sold.
7. Stitch one button onto the end of the lace, making sure the button is sewn VERY securely to the lace. See how coordinating thread might have been a good choice here? Oh well.
8. Now for a coordinating button! Ahhh buttons. Here's my collection. I love
Found the winner!
9. Attach a strip of elastic measuring about 1 1/2" to the other cut end of the lace and secure the coordinating button on top of it to conceal the raw elastic edges. I tend to get a little over-zealous in carrying out my plans (which I make up as I go along) so sometimes I forget to take pictures of crucial steps. This was one of those times. But fear not, I made another lace cuff and I remembered the second time. :)
Here's the second bracelet:
Cute and easy, right?
I am in love with these lace cuffs! I wore one a few weeks ago with a simple outfit and I felt like the bracelet just gave my look a little something extra and special. And extra special. :) Enjoy!
Linking up at I heart naptime, six sister's stuff, today's creative blog, kojo designs, and tatertots and jello
Friday, September 30, 2011
guest post @ The Letter 4
I'm sharing a little tutorial over at The Letter 4 today. Stop over and find out how to make these cute, quick, EASY lace cuffs. TGIF!
Sunday, September 4, 2011
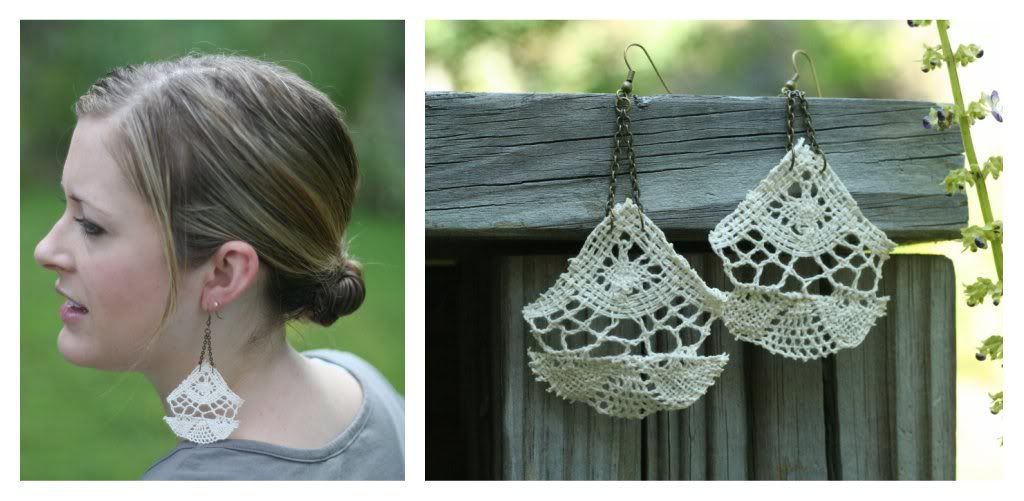
lace earrings
I did a tutorial a few weeks ago on how to make these lace earrings... and I'm sharing that post here today! :)
I'd love to show you how I made these lace earrings, inspired by a pair I saw at Anthropologie last weekend. These earrings were so simple to make, and I love the vintage, time-worn feel to them. I love making jewelry, but you do NOT have to have a lot of jewelry making experience to make these earrings. The jewelry tools are a good investment, and they are honestly not expensive, especially with a good old 40% or 50% off coupon. :)
Materials:
-a piece of crochet-look lace, maybe 1/4 yard (I got mine at Joann's for $1, regular price)
-chain
-jewelry findings: earrings (ear wires) and metal ring things (jump rings)
-scissors
-jewelry tools
-disappearing ink pen
-not pictured but VERY essential to this project: Fray Check
1. With the disappearing ink pen, trace the part of the lace that you would like to make up the earrings.
2. Cut out the pretty new lace shapes. I'm a fan of the more "teardrop" style. :)
3. Run a line of Fray Check along the edges of each lace piece, being careful with the lace since it will probably unravel quite easily. I let the Fray Check dry overnight and put another line along the edges of the lace the next day and let dry. I wanted to make sure those puppies weren't going to unravel on me!
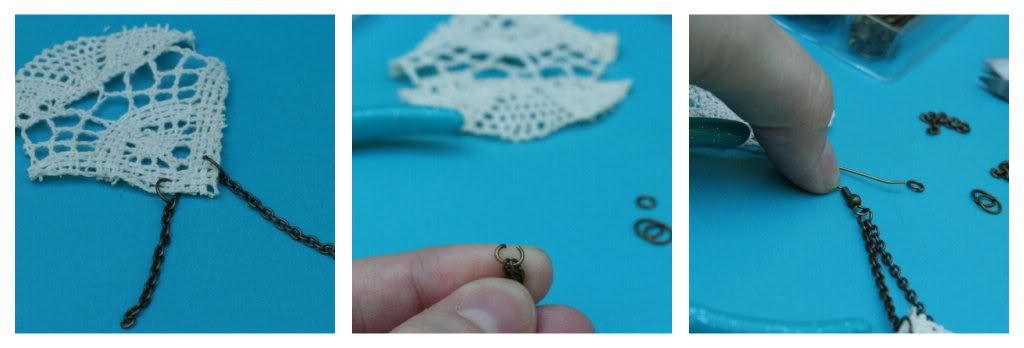
4. Measure and cut 4 equal pieces of chain. I started out with them each being 1 1/2" long (but as you'll see shortly, I cut the chains down a but because the earrings were much too long for me... you can always cut the chain, so overestimate!). Then, using 2 larger jump rings, connect them to the top of the lace, making their spacing even.
5. Attach the chains to the jump rings. Then, connect the ends of the chains with a small jump ring, and add an earring wire to the small jump ring. Close the jump ring securely.
6. Pretty. Try the earring on!
7. If the earring is too long, cut the chains down to make the 1" long and reattach. Try the earring on again and see if the length is to your liking. If not, feel free to shorten again, but I ended up stopping here and using the 1" chain length.
8. Repeat steps 4-7 to make the other earring. Try them on and love your new vintage-look accessories (that cost wayyy less to make than their $32 inspiration earrings)!
I love these earrings! You could also try tea-dying the lace, dying the lace with different colors (like the Anthro ones) or even crocheting your own (if you have that awesome skill, which I definitely DON'T but hope to someday!) and attaching the earring findings to them. Enjoy!
Linking up at I heart naptime, six sister's stuff, today's creative blog, tatertots and jello, chef in training, and boerman ramblings
Thursday, September 1, 2011
braided leather headband
A few weeks ago, I did a guest post on how to make this fun leather headband. I thought I'd share it here on my blog, too. I'm trying to get my act together for a weekly 52/1 post too, but I thought this would help bide my time a bit. :)
Today, I'd love to show you how to make this headband, inspired by an Urban Outfitters headband. I love making "knock off" accessories, and this headband was easy to make and I am so happy with the way it turned out.
Let's get started!
Materials:
-leather (or suede, or even strong fabric) scraps that are at least 22" long
-grosgrain ribbon
-1/8" elastic
-scissors
-glue gun
-Fray Check
-tape measure
-needle and thread
1. Measure your head all the way around (like how your would wear a headband). Cut the leather into SIX strips, 1/2" wide and the measurement all around your lead long. My measurement was 22", so I cut six 22"x1/2" strips.
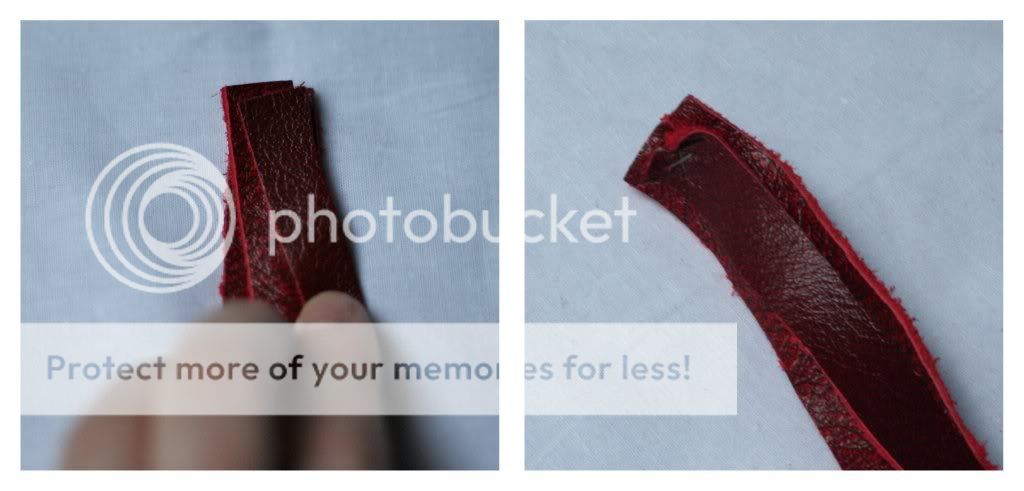
2. Take three of the strips and stack the ends on top of each other. Hand sew the ends of the strips together.
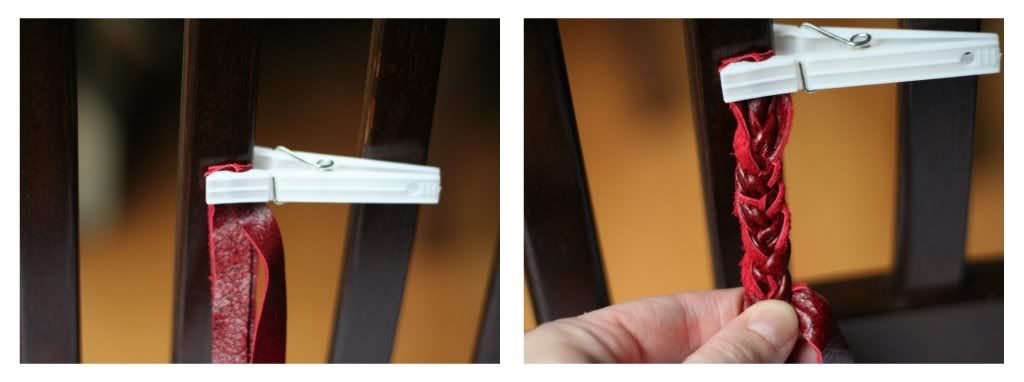
3. Take a clothespin and pin the sewn ends of the strips to something sturdy; I used the back of a chair. Tightly braid the strips together. I tried to keep the smooth part of the leather on the top part of the braid, but let just a bit of the underside show.
4. Braid to the end of the strips, and pin the ends together with another clothespin.
5. Stitch the ends of the braid together and trim off any excess leather to make the ends even.
6. Repeat steps 2-5 with the other three strips of leather, resulting in two leather braids.
7. Stack the ends of the braids together and stitch together.
8. Repeat on the other ends of the braids.
9. Cut a 4" piece of elastic. Stitch one end of the elastic to one end of the braids, then stitch the other end to the other end of the braids. At this point, I tried the headband on to make sure the elastic was tight enough to fit my head. If it's too loose, you can always take the elastic off one end and cut the elastic down a bit (or if it's too tight, cut a longer piece of elastic), then reattach it and make sure the headband fits your head.
10. Cut a 2" piece of ribbon. Using the glue gun, run a strip of glue along one side of the ribbon. Glue the ribbon to the end of the braids where the elastic is stitched on, and wrap the ribbon around, gluing the ends of the ribbon on the inside of the headband.
11. Apply a bit of Fray Check along the unfinished end of the ribbon to prevent fraying.
12. Admire your trendy, handmade headband! Urban Outfitters has nothing on you! :)
I am in LOVE with this headband! I think I'm going to make a bunch more in different colors! Enjoy!
Linking up at I heart naptime, six sister's stuff, today's creative blog, tatertots and jello, chef in training and boerman ramblings
Tuesday, August 23, 2011
a {tute} sweet tutorial
I'm sharing a {tute} sweet Tuesday tutorial over at {trulie-scrumptious}! Find out how to make these Anthro-inspired lace earrings and leave some love for Ashlie and Rozalynn, the lovely sisters behind it all!
Subscribe to:
Posts (Atom)


