


I have obviously been a teensy bit obsessed with lace lately (see this guest post), and I just can't help it. I love the vintage feel, the girly-ness, and the cheapness of this headband. I had coupons, so it probably cost me five bucks tops to make.
Materials:
- 1 to 1 1/2 yards of lace/crochet lace
- 1/8 inch braided elastic
- button
- needle & coordinating thread
- scissors
- tape measure
- iron
- sewing machine
- Fray Check -- only if needed

Don't forget the coffee.

1. Cut the lace to the desired length of your headband. I measured around my head from crown to ears (where I would normally wear a headband), and cut my lace to about 17".
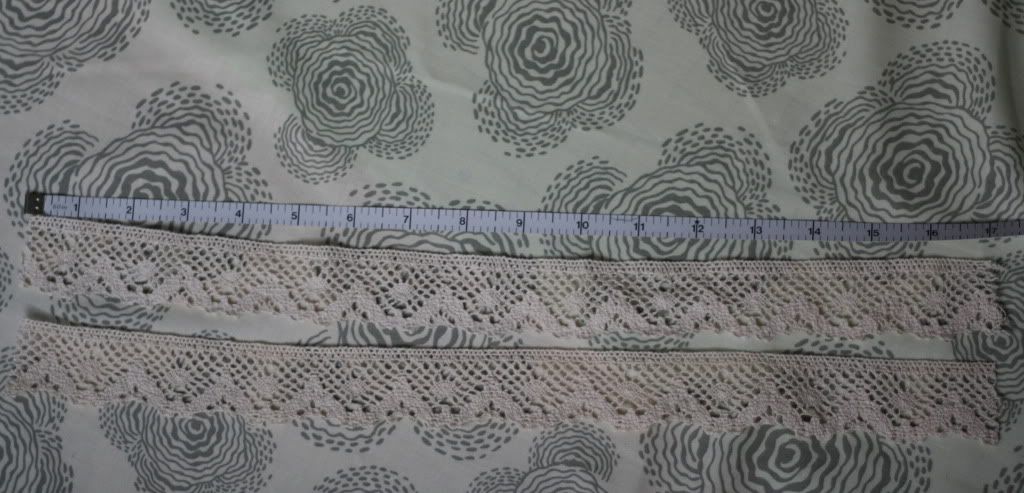
2. This step is totally optional, depending on the type of lace you are using. Mine is a trim, so one side is flat and the other is scalloped. I wanted both sides to be scalloped, so I cut TWO 17" pieces and pinned them together, matching up the flat sides. I then sewed down the center line.


3. Cut your elastic. I used about 5 1/4". Make sure to cut more/less depending on the size of your head, but I figure my head is pretty average sized.

4. Fold one end of the lace over about 1/4". Press with an iron. Then, fold one side of the lace over (about 2/3 of the way across the lace) and then fold the other side over.
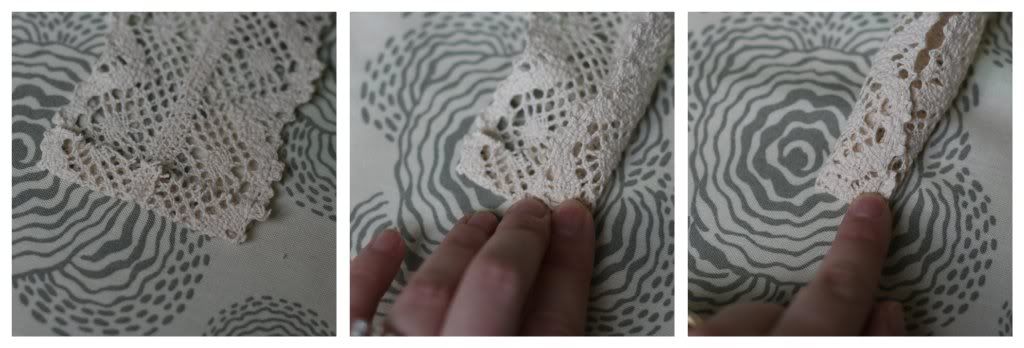
5. Press, and repeat step 4 on the other side. Press.

6. Open the sides of one end of the lace and place an end of the elastic in the middle. Close the sides and pin.
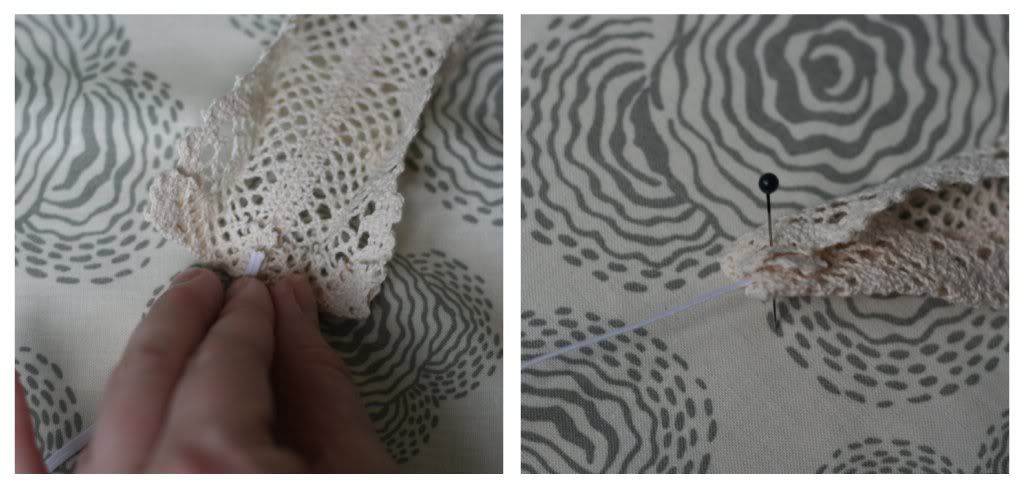
7. Stitch the sides closed with the elastic in the middle. Make sure to go over your stitches a few times to make the elastic secure. Repeat on the other side of the lace.

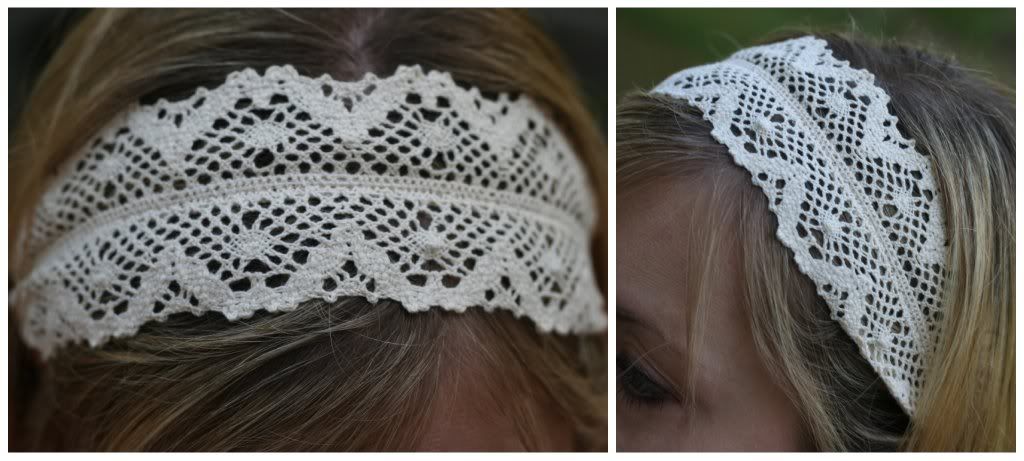
You can stop here, if you like, and end with a plain lace headband. Pretty! Or continue on, and add a embellishment.
8. I decided to go with a trusty rosette to embellish my headband. I'm getting rather tired of fabric rosettes, but I like the dimension the lace gives. I used another piece of lace that was about 20" long, but you can use more or less, depending on how big you want your rosette to be. Start with knotting one end of the lace. Twist the lace and then wrap around the knot.
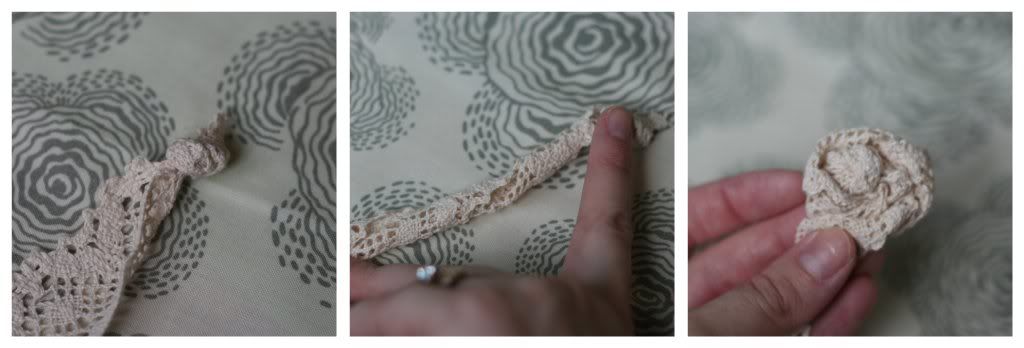
9. Continue twisting and wrapping the lace, until you've used it all. Tuck the end of the lace underneath the rosette, and hand stitch the rosette together. Here is where you can use a bit of Fray Check to make sure the ends don't fray (duh). I passed on the Fray Check and made sure to just stitch really securely. Add a button to the center of the rosette.
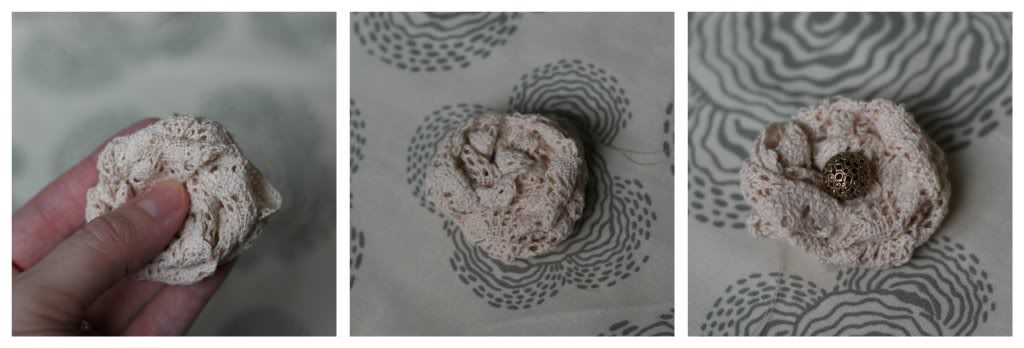
10. Hand stitch the rosette to the headband.

All done! You're welcome for the mirror shot. So not awkward, right? Ah, well, it was either that or one of the kids take the picture, and Mac's in a "throwing stuff" phase, so I think the mirror shot was the safest bet. :)

Linking up at I heart naptime, six sister's stuff, today's creative blog, kojo designs, and tatertots and jello
I just popped in from the Six Sisters' link-up. I love this idea! Thanks so much for sharing!
ReplyDeleteThis headband is absolutely beautiful! I found you through Six Sister's. Thanks for the inspiration!
ReplyDeleteadorable I too am obsessed with lace headbands! I love everything vintage and girly!
ReplyDeleteooh... I am so going that! Finding new ways to use lace = me, happified.
ReplyDelete~Simi (giveaway at the blog!)
That's so cute!! I love it :)
ReplyDeleteSO Cute! I will be using this!
ReplyDeleteThat is so cute! Will definitely have to make one for myself :) Pinning this!
ReplyDeleteThis is adorable. I'm usually not a lace person, but this just might change my mind!
ReplyDeletehi! i love your etsy shop, and i was wondering if you were okay with sponsoring a giveaway on my blog. you could choose what to giveaway, and i'm sure it would get you a bit more traffic :) if you are interested, email me at theblogofsimplybeautiful@gmail.com
ReplyDeleteThat is so pretty and would be great for an adult or young girl. Love the versatility! You have some great stuff here. I am a new follower from Tatertots and Jello. Vicky @ www.messforless.net
ReplyDeleteLove this idea, and I have just the lace to do it. Thanks for sharing!
ReplyDelete